What is behind a photo fridge magnet?
Photo fridge magnets can use flexible magnetic sheet or a rigid pressed shell. The backing, print, and protective layer are separate things to check. A photo on the front does not tell you how firmly the back holds, and construction alone cannot establish a product's measured strength or lifespan.
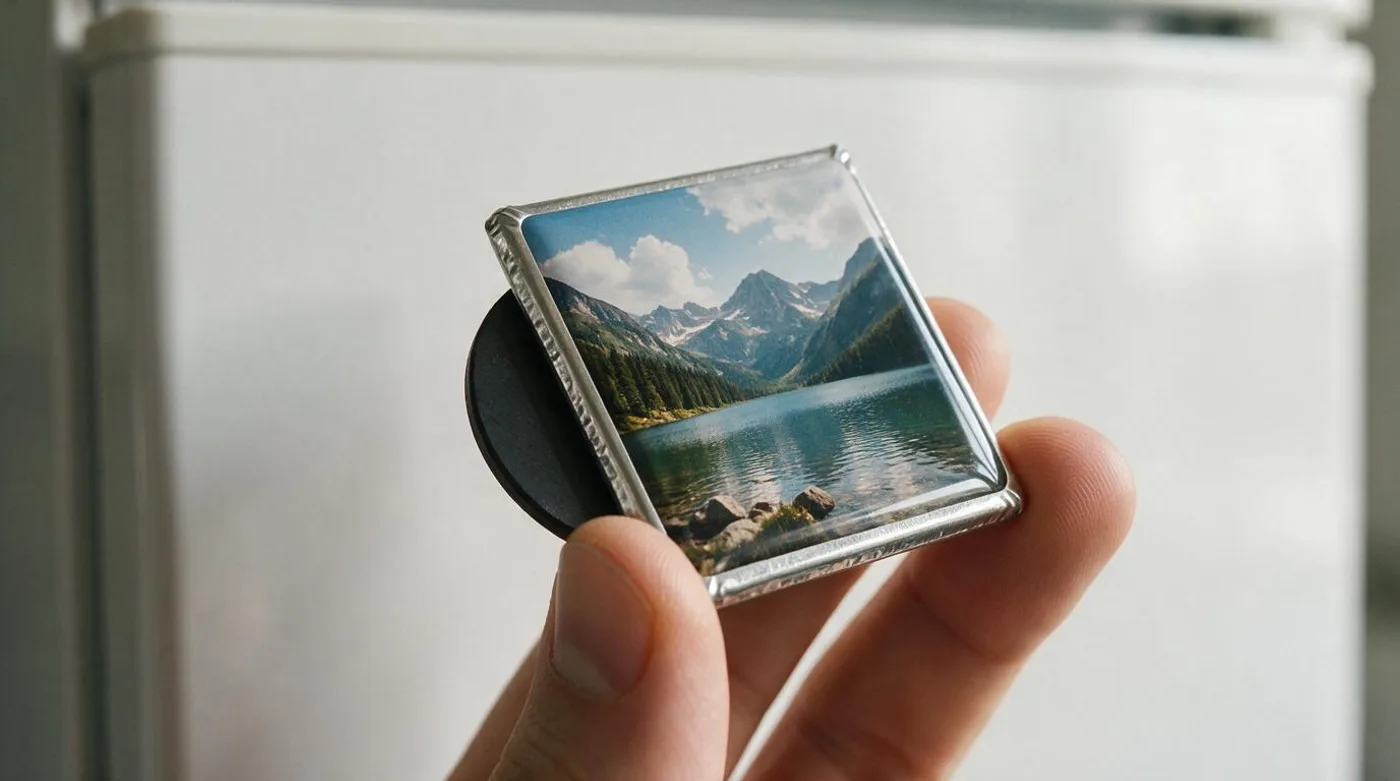
Two photo magnets can have the same outline and use different backs. To compare them, look at the edge and underside as well as the picture.
Two constructions to recognise
| Detail | Flexible sheet | Pressed shell |
|---|---|---|
| Body | A flexible magnetic sheet carrying a print | A rigid shell carrying a print |
| Print protection | A coating or laminate, depending on the product | A clear cover or finish, depending on the product |
| Magnetic backing | Usually part of the sheet itself | A separate backing fitted to the shell |
| Useful question | Is the stated thickness for the sheet or the whole assembly? | What covers the back, and does it sit flat? |
Custom fridge magnets are made in both forms. The word custom describes the design you provide; it does not specify the backing or how the finished magnet performs.
Printable magnetic sheet is a material category with several printing options. Magnum Magnetics supplies substrates for different presses and printing processes. A product made from sheet may have a printed top layer or a print mounted onto it. Ask which finished surface the listing describes rather than assuming every flexible photo magnet has the same coating.
For a rigid product example, the Fresh Magnets photo magnet collection lists a pressed shell with a protective finish. Its prepared shapes include 2 inch and 2.5 inch squares, a 2 x 3 inch rectangle, and 2.25 inch and 3 inch rounds. Check the selected product for the finished specification and ordering availability. The catalogue description does not establish a measured holding force.
The diagram shows one common pressed assembly. Individual products can use different materials or layer arrangements, so treat it as a construction example.
Read the edge and back
An edge view can show a rigid rim, a cut laminate, or a print attached to a separate board. A photograph of the underside helps you see whether the magnet covers most of the back or occupies a smaller patch.
Those details help identify the construction. They do not replace a sample. Check that the backing is clean, that no sharp edge touches the door, and that the piece rests against the surface without rocking.
For dimensions, distinguish the finished outline from the visible print area. A rim or wrapped edge can make the picture smaller than the stated magnet size. The measurement guide explains which dimensions to record.
Keep strength and lifespan separate
A seller's pull-force rating may describe a straight pull from bare steel. Paper under a magnet adds a gap, and a vertical fridge door also requires enough friction to prevent sliding. Neither the shell nor the photograph supplies that information.
Likewise, a protective finish can reduce direct contact with the print, but it does not establish a number of years before fading. That needs a stated test or a product-specific guarantee.
Use the strength chart to understand the different measurements, and the size visualizer to compare outlines. For an order, check the actual seller's specification and template.
Check the picture area separately from the outside edge
A 2.5 inch square (63.5 mm) describes an outside outline when the seller measures the finished magnet that way. The photograph you can see may occupy less space. A rim can cover the perimeter, while a wrapped print can continue around an edge that faces away from you. The template should identify the visible area as well as the part that will be cut or folded.
Keep faces, lettering, and a child's signature inside the safe area shown on that template. Extend background color into the bleed area if the printer asks for it. Bleed is extra artwork beyond the intended visible edge; it allows for cutting or positioning variation. It does not give you extra display space on the finished magnet.
Check the crop with the outline visible. A round crop can remove the corner of a square image even when the square's width matches the circle's diameter. Moving a face inward may solve that problem without changing the magnet size. Ask whether the ordering preview shows the final visible picture or the complete print before assembly.
Work out what the magnet will hold
A photograph printed on the magnet and a loose photograph held underneath it create different arrangements. In the first, the picture is part of the magnet. In the second, paper separates the magnet's back from the door. If you want to use a photo magnet to hold a school letter, assess it with that letter in place rather than with the backing touching bare steel.
Start with one sheet and the display surface you actually use. Add further sheets only if they stay in place. A thick fold, a staple, or a curled corner can prevent even contact. Move the paper so those features sit away from the backing, then check again. This is a practical fit check for that arrangement, not a laboratory rating to apply to every magnet in the pack.
K&J Magnetics explains that gaps and coatings affect a straight pull test. On a vertical door, sideways slipping adds another question. Record whether a magnet separates from the door or remains attached while sliding. If it holds on a separate steel board but fails on the fridge, read the stainless fridge guide before buying a different photo set.
Inspect a sample before repeating an order
If a sample is available, compare it with the selected listing and the template you used. Measure the finished width and height. Check whether the print sits straight within a rim, whether the back lies flat, and whether the edge touches the surface without a raised hard point. Inspect the face in ordinary kitchen light as well as under a brighter lamp.
For a photograph with people in it, check the detail you care about: an eye, a name on a shirt, or a small part of the background you wanted to keep. You do not need to judge the whole printing process from that sample. You need to know whether this picture at this size does the job you intended.
Keep the file and order details with the sample. If you change the size, finish, or crop for the next order, the first sample cannot confirm the new result. A useful record names the product and dimensions, notes the selected finish, and shows which image version went to the printer. The seller specification comparison separates those listed details from checks that require the finished magnet.
Pack and store the assembled magnet
Treat the front and back as separate surfaces when storing a set. A hard rim moving across a printed face can cause marks, even if both magnets looked clean when packed. Put a clean separator between them and keep the stack from shifting inside its container. Use packaging that supports the complete magnet rather than pressing a corner into a soft envelope.
For a drawer or storage box, measure the whole assembly's thickness. Ten rigid magnets with raised edges may leave gaps in a stack, so multiplying one nominal thickness by ten can underestimate the space required. Measure the actual stack when you have it, including separators. Flexible sheets need a container that keeps them flat without folding their printed edges.
Follow the maker's cleaning instructions. Remove loose grit before putting a magnet back on the fridge and check the appliance's own care instructions for the door finish. A damaged backing, loose component, or sharp edge is a reason to take that magnet out of the display until it can be repaired or replaced. Save a photograph of the problem and the original order record if you are contacting the seller about it.
Frequently asked
Does custom describe the magnet backing?
No. Custom describes the supplied image or design. Check the listing separately for the backing material and finished dimensions.
Is a pressed photo magnet always stronger?
A rigid shell does not establish a pull-force rating. Backing dimensions, material, surface contact, and the test conditions all matter. Compare measurements taken under the same conditions.
Does the listed size include the rim?
It may refer to the whole magnet or the printed area. Ask which one the seller measures before planning a close-fitting arrangement.